Event/Long Event Signup
The Signup for an Event or a Long Event works in the same manner as the Lottery for a Course. Article on Course Lottery
- Add New: create a new Signup
- Name: Edit a recent Signup
Create your Events/Long Events first. Click here to learn how to Add an Event or Add a Long Event. Before Elements can be added to the Signup for an Event or Long Event, the Events themselves must be created.
- The access to those Events or Long Events, in the Signup, will be limited to the Students who are enrolled in the Course itself.
- Leo assumes that if you are linking Events or Long Events to a Course, the attendees must be part of the Course to attend the Event.
- NOTE: If you do not want to limit the attendance to Students from a particular Course, then do not link the Event's Signup to a Course.
Path: Admin Toolbar > Course Management > Lotteries/Signups

Add New Event/Long Event Signup
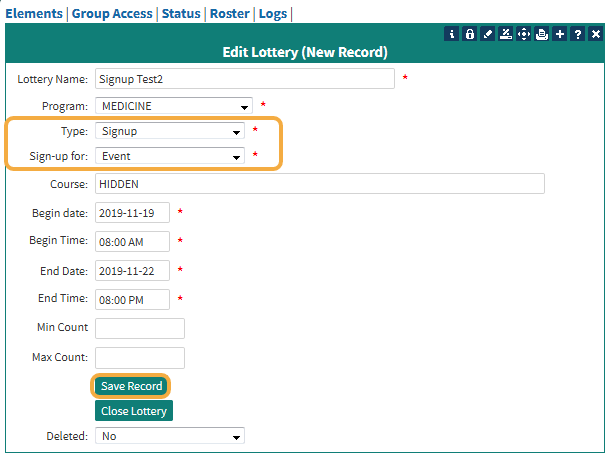
This New Record screen is used to create a Signup for an Event.
- Signup (Lottery) Name (*): Create a name for the Signup
- Program (*): Select from drop-down
- Type (*): Select from drop-down: Signup
- Signup for (*): Select from drop-down: Event
- Course: Hidden
- Begin Date and Time (*): Select on pop-up calendar
- End Date and Time (*): Select on pop-up calendar
- Min Count: Enter the default minimum number of Signups required; 0 = no minimum limit
- Max Count: Enter the default maximum number of Signups required; 0 = no maximum limit
- Save Record
- Close Lottery
- Deleted: Yes/No Toggle
Best Practices: We recommend that you click the Save Record, and then reopen to add Elements
Add Event Elements
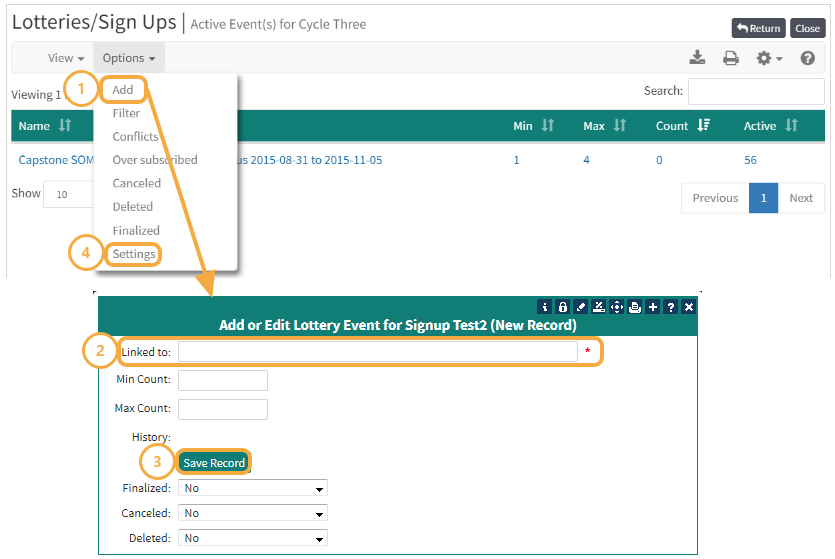
This report will show you the Elements selected for this Signup.
1. Add: Click to Add or Edit Elements in the Record screen
2. Linked to: Begin typing for the Events that you wish to add to this Signup. Double click to see a list. NOTE: Only first 100 items will be shown.
3. Save Record
Keep repeating these steps until you have the number of Events that will be part of this Signup.
4. Clck the Settings links to return to the Signup Edit Screen
Group Access
- Click Group Access
- Select a Group from the Available Groups to move into the Selected Groups
- Click the square to close the window
